Chez Marc Grossman
  • Home
  • Blog
  • Tahoe Cabin

RV-6 Autopilot 2

7/29/2010

 
Now I’ve incorporated a second servo into the code and I’m able to control two servos independently with the ATmega32. This is all on a dev-board however and not very useful yet.

For those of you that have hobbied in electronics you know that getting something to work on a dev board is only half the battle. There is a lot that can go wrong between the dev board and a hobby box.

Here again are the steps necessary to get to where I have an autopilot in the RV.
  • Control servo with microcontroller
  • Control multiple servos with microcontroller
  • Incorporate buttons and control servos with microcontroller and package it all
  • Incorporate servo into elevator to control the trim tab
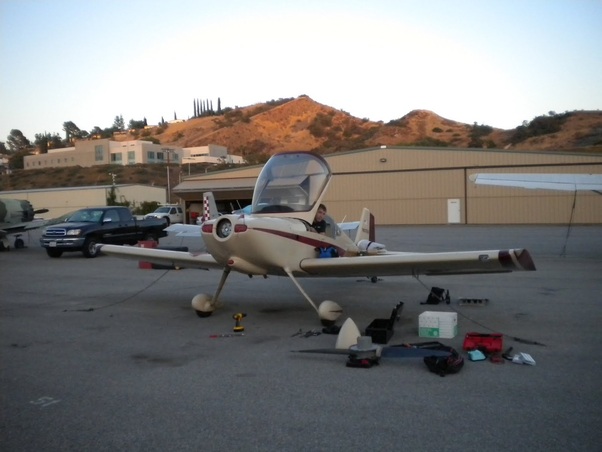
  • Put entire mechanism into RV-6
  • Verify that the trim tab has sufficient control authority (test flights)
  • Add servo control to ailerons
  • Verify that aileron servo has sufficient control authority (test flights)
  • Add sensor package to airplane that interface through microcontroller
  • Interface microcontroller with Matlab/Simulink
  • Develop control algorithms
  • Verify stability of control algorithms
  • Gain tuning
  • Port control algorithm from Matlab/Simulink to C

RV-6 Autopilot

7/24/2010

 
In the videos below you’ll see that we’ve incorporated our servo into the elevator of the airplane and we’re able to control it using the microcontroller.
In the first video we’ve incorporated the servo into the body of the elevator and it is controlling the trim tab. The microcontroller is still attached to the STK-500 dev board though and it's clearly not a well packaged setup at this point.


In this second video, we’ve removed the microcontroller from the STK-500 and placed it inside a project box that we’ll Velcro inside the airplane.

We did have some questions about how long the leads to the servo can be before there is too much noise coupled into the signal line from the power lines running next to it, but we’ve now tested things by placing about 4 meters of servo wire and had no problem. Should we develop much of a problem we can put some de-coupling capacitors on the servo, and we could always run an I2C or SPI bus to another chip at the rear of the airplane closer to the servo form which the PWM could be generated. Another option would be to use a coax, or other shielded cable for only the signal line instead of lumping it in with the power and ground for the servo. We haven’t seen any problems yet, but there is more testing to be done still.

RV-6 Maintenance Part Deux

7/23/2010

 
We’ve now put 100+ hours on the RV and it was time for a little more maintenance. We’ve been making notes of things that needed a little attention and we’re now looking into those. For example, our DG (Directional Gyroscope) used to hold its heading fairly reliably, but recently it’s been loosing its heading at a rate that surprised us. We’ve therefore taken it out to have it worked on. Of course, before we have a professional fix it, I had to play with it myself. Below, you’ll find three videos of me playing with the gyro.

In the second video what you’ll notice is that as I apply a constant force to the base of the gyroscope it rotates counteracting that force of mine and does not move. Then as the axis of the gyro becomes coaxial with the axis I’m applying the torque about the gyro freely rotates. This gyro has limits on it to prevent itself from reaching, or passing that singularity because it becomes useless at those attitudes. Furthermore, it re-centers itself such that its rotational axis is in the “horizontal” plane when you push the knob in to either adjust the heading, or simply to re-center it. This is an important note because all gyros drift and if it did not re-center itself every time you adjusted it it could easily wind up with its axis of rotation about your yaw axis of rotation (ie the world’s N,S,E,W reference frame) at which point it would prove useless. Keep in mind that the base that I’m applying torques to is connected to the heading plate in the gyroscope that rotates and indicates the heading to the pilot. With that in mind the videos should make a lot more sense.

Hood River, Oregon

7/4/2010

 
Picture
This blog was supposed to be more about the projects I’ve been working on, but I’ve decided to share some other adventures of mine with you all as well.

The weekend of the 4th of July my girlfriend and I traveled up to Portland, Oregon on our free Southwest flights. Since we’re in a semi-long distance relationship you would be amazed at how quickly free flights are accumulated. Anyhow, we had these free flights and we needed to use them so we thought we’d check out Hood River.

We flew in and had dinner with my aunt, uncle and cousin in Portland before driving to Hood River to camp for the weekend. During our stay, we went boating/fishing on Lost Lake, we visited the WAAAM, we went wine tasting on the gorge, we caught a sturgeon on the gorge and we took in all the beautiful scenery. That area is particularly beautiful and I hope to make it up there some day for more than just a couple days.

You can check out the pictures of our trip here: Hood River

Picture
We rented some row boats and went fishing on a beautiful lake up by Mt. Hood.

Picture
We caught some trout and ate them for dinner.

Picture
Caroline reeled in a good size sturgeon.

Picture
We checked out the WAAM. (Wester Area Aviation Museum). This here is an old Cub fitted with extra wheels for soft field (very soft field) landings.

RV-6 Maintenance

7/2/2010

 
Picture
Well, I’ve taken a little break on the microcontroller stuff for the RV-6 autopilot because the plane needed a little love. It’s been flown 50+ hours since Cedric and I bought it in February, 2010 and there was some maintenance that needed to be done before a trip to Tennessee.

We took the cowling off, changed the oil, re-wired some of the electronic ignition, re-sealed the right fuel tank, cleaned up some of the wiring, replaced the fuel filters, re-plumbed some of the vacuum lines, and a couple other things. We worked every evening from about 17:30 until about 23:00.

In the end we were able to complete all the necessary work in three evenings of work and the plane was ready to go by the 3rd of July.

    Author

    I've just got a lot of interests to put it simply. This is a portal into my thoughts, ramblings, and projects.

    Archives

    May 2016
    April 2016
    March 2016
    August 2011
    May 2011
    August 2010
    July 2010
    June 2010
    September 2009
    June 2008
    February 2008
    January 2008
    November 2007
    October 2007
    September 2007

    Categories

    All

    RSS Feed

Powered by Create your own unique website with customizable templates.